Monday, September 10, 2007

Yellowware Collection

The Challenge

We had 7 days left to pack all of our belongings and move to another state. With a swarm of mess surrounding me, I heard myself say, "yes" to this commission. Was I crazy? I still don't know (although my husband may tell you that he does). Against every practicality, I took on the challenge of painting in 2 days the largest still life I have ever attempted. Before I knew it, 16 pieces of exquisite yellowware, a few apples, and some fresh daisies were facing me, ready to be reproduced on a 16"x36" linen canvas. In the 20 hours of painting that followed, I wrestled with all the doubts, fears, and frustrations that artists face when brush meets canvas.


The Subject

Some of you are thinking, what is Yellowware? I thought the same thing when Elisa commissioned a painting of her yellowware collection. Here is the skinny on this handmade kitchen fascination taken from Martha Stewart's website.


"From the 1830s until the 1940s, when Pyrex and plastics took over, yellowware was ubiquitous in American kitchens. Yellowware is a ceramic fired from the fine yellow clay that lines riverbanks from New York to Ohio. Its color ranges from butter yellow to deep mustard, and it was popular due to its low cost and durability -- it could even withstand the heat of a woodstove."


I knew that these were special pieces, not only by how much Elisa told me she paid for her smallest bowl, but it was evident in each unique chip, imperfection of line, each variance of shade, and evidence of use. Each lovely piece was a unique gem with a story to tell. My hope was that this would come through in each brushstroke.


The Setup

By the brilliant suggestion of my husband, we took my table top off its stand and placed it up on top of my art supply chest in order to get a straight-on perspective while I sat to paint. After this photograph, I sent him out to fetch some bright white daisies to break up the yellow of the dishes and darkness of the table. I also added a white table cloth to give an area of soft edges.


Surprisingly (and I believe by God's help) it only took me about 30 minutes to arrange all the pieces. Perhaps another 10 minutes once I decided to add the towel and daisies. The apples were an easy choice for the purpose of breaking up the yellow, and to also bring out the deep brown stripes on some of the pieces.

It is difficult to tell in the photograph, but there are many varying shades of yellow. The pieces are arranged not only by shape and composition, but also each piece is set beside, against or in front of a piece with a lighter or darker shade. This was done in order to create as much contrast as possible so that the pieces don't get lost in a sea of yellow. For surely not all beautiful things make a successful painting, the consistent color would prove to be a challenge.


The Setback

The thing that makes my studio so beautiful and enjoyable is also what causes much difficulty in painting. If you remember my comments on my studio in a previous post, you will understand what a day of fast moving clouds on a sunny day will do to ones sanity while painting.


Usually, I can adjust to changing light and paint finishing as I go. This can be done if the light stays the same for at least 15 minutes at a time. On this particular day, the sun was beaming in brightly then was hidden behind clouds. Back and forth it went several times each minute, making it quite impossible to accurately paint anything. It was not possible to put off the painting for another day - it had to be today or not at all. I was close to accepting defeat until my husband once again saved the day with another brilliant idea.


The Solution

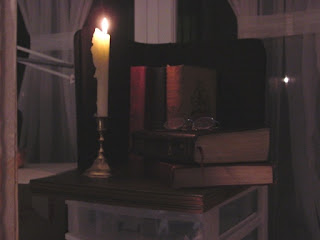
It would be difficult and nerve wracking, but we had to do it. We cleared out our second bedroom, covered the window with cardboard, and very cautiously lifted the tabletop and carried the entire setup - dishes, apples, from the front porch, all through our cluttered half packed house, into the bedroom, and onto the dresser. Amazingly it was the same height as the other one, and I had just enough room to achieve the same distance and angle from the still life.


Please excuse the packing clutter.


And please notice the wonderful lighthouse painting on the wall.


It is my husband's handiwork.


It was also a great help to me in that, I could now paint at night with consistent lighting. This also would be a huge factor in the completion of the painting, as I was not guaranteed continual sunny days.


The Progression

Well, enough with the prep, lets get to it and see how this painting came to be.


As usual, I start with a rough sketch in a burnt sienna wash. As time goes by, I find that I don't need to draw in each detail, but merely give myself an indication as to where things will be. I paint to finish as I go, and find this to consistently be the best way to avoid an overly tight painting and it helps keep it fresh and spontaneous looking.


I believe the first thing I painted was the daisies on the lower right. I knew that since they weren't in water that they would fade and droop quickly. Besides, they were the most fun to paint and are my favorite part of the painting. It's best, if possible, to begin painting where one feels the most confident - choose the easiest shapes first. Having one part correctly painted will help set the tone and the confidence will carry on throughout the painting to the more difficult sections.


I believe it was at this point, late at night that my dear husband brought me a milkshake.

I love him.


Up until this point I was unsure as to how to handle the dishes on the outer edge and the background. I was sure, however, that the crock on the right was too close to the edge of the canvas and should not be brought to a finish. I then decided that the outer pieces should be looser and more of a hint of detail in order to bring one's eyes back into the painting. I also decided that the background should be simple, yet have some movement to it, and settled on a rough look with varying values and temperatures.


The Finish Line

Here are a few closeups and comments for your enjoyment.


Pieces on the right are blocked in and will be adjusted and corrected later.


Simple highlights and some indications of detail were given to the outer crock to engage the viewers mind to complete the image, to avoid a tangent at the edge of the painting, and to bring the viewers eye back into the painting.


With all of this yellow, it was important to seek out those colors that one might not expect to find, and perhaps accentuate them a bit to create some interest and contrast. I punched in some pure red cadmium in the apples, added some cool blue splashes and deep reds to the yellowware's shadow side, and allowed some of my burnt sienna under drawing to show through in select areas.


Sometimes the quickest objects to paint become my favorite. The daisies had clear light and shadow, were a refreshing contrast to the object of focus, and were playful additions to the painting. It was the most enjoyable half hour of this commission.


Seen here is the finished painting, after over 20 hours of solid painting, it was finally finished. The painting then spent another day and night in front of a fan to be sure the piece was dry enough to send home with its teary owner.

Saturday, July 21, 2007

Returning


Forgive me for my long absence. The busyness of life and many unexpected changes have kept me away from blogging for some time. I am finally ready to slowly return to my life and schedule of normality. My husband and I have moved to NY, so amid some time crunching last minute commissions, packing, saying goodbye, getting settled, limited internet, blogging has fallen behind.

So to show my appreciation for your continued visits to this site despite the cobwebs gathering,
I have brought roses for you.


Tuesday, March 27, 2007

New Life Island Entrance

Last fall, I took a trip to New Life Island with the intention of painting some landscapes that will be auctioned off this coming fall to help the camp raise some much needed funds. I documented my daily NLI adventure on blogspot and also recorded the progress of each painting.

Because of weather and time, I had to leave the island with 3 completed and 3 incomplete paintings. At the beginning of this year, I began touching up the incomplete paintings so that they will be ready to display during the camp season this year.

Today I finished one of the paintings. This is the view from the entrance of the island. One of the boy's cabins can be seen on the left. The main road that runs the length of the island is followed closely by a fence whose posts we were hunting for in the woods after the first devastating flood.

Plein air painting (painting a landscape on location usually in one sitting) is very challenging, as there are many factors that change constantly while one is painting. The sun moves from one side of the sky to the other, changing light and shadow slowly sneakily before your very eyes. Clouds block the sun changing the intensity of your moving light and shadows, also changing the colors of the subject. And then there are the millions of blades of grass, twigs, leaves, and uncountable color and value changes that one cannot possibly record on canvas, but must fight ones own brain to simplify what one sees into paintable main shapes.

As difficult as it was to paint last fall on location, new challenges met me as I began to paint from poor reference photos in my studio. Much color is lost in a digital photograph, one is at the mercy of their printer to display a spectrum of color and light one can only take in with their own eyes.

Every challenge, however is an opportunity for growth. One more painting remains - the beautiful dining hall and the main piece of the collection. May my paintings reflect all that is good and meaningful about the camp.

Tuesday, March 13, 2007

Savory Cloves


I
've been enjoying the daily painter's movement - sort of watching from the sidelines unable to participate in the commitment of a painting each day. These little gems of spontaneous impressions are so much fun to look at, and I imagined it might even be more fun to actually paint a small piece.

I was inspired by one of my favorite daily painters, Carol Marine, as she doesn't shy away from color and bold strokes. I especially love her compositions and imaginative titles.

I usually place my subjects on white without thinking, so I decided, not today! Today I would splash my canvas with unrestrained color. I had a blast!


In 3 hours it was over, but what a rush. I only had time to be decisive and direct. I will definitely try my hand at small works in the future.


Daily painters can be found many places, but here are two links to get you started:

Friday, March 09, 2007

Cobalt and Petals


T
he sun was bright, so I decided it was a good day to get back into a painting that had been waiting for me to complete.

The roses were painted in early fall - right before the chill put our rose bush into hibernation. They died long ago, and I’m glad that I painted them first thinking ahead that I might not finish the entire scene before they shriveled.


The cobalt vase was my focus, today, and although the sun is shining directly into the studio for a longer period of time these days, it was not long before a shadow from the window moulding crept across the still life, thus forcing me to stop for the day.


I painted for less than an hour, but the basics were covered, and I will return on Monday with a set of fresh eyes ready to capture the inaccuracies of today’s painting session.

Wednesday, March 07, 2007

Studio Lighting ~ Q and A

One of my former classmates, the talented Lauren Pope, asked me some questions regarding studio lighting. Instead of answering her privately, I thought that I would take the time to post my answer as a blog for everyone. This also gives me the opportunity to open my studio up to you all with some more photographs.

Here are her three questions:

#1: Do you have shades or blinds for the windows?

I have no shades or blinds. I do have cute thin little curtains that mostly serve as decoration. I used to have shades before my landlady repainted the porch. She replaced the very old, yet useful shades with the shear curtains. The one good thing is that I can easily remove them if I need direct sunlight.

If I had my way, a large budget, and if the studio wasn't the main entrance to the house, (as it is actually our front sun porch - talk about a fish bowl) I would love to have black shades installed. I doubt that's a common practice, and I would probably have a hard time finding them, but it seems to me to be a perfect solution to controlling the lighting in this room. But until then, I am enslaved by the weather, ever changing light and shadow on my still lifes, and think of myself as an honorary plein air painter for that very reason.

It's been a challenge to learn how to set my still lifes up in relation to where I think the sun will be during my session. In the fall and winter I have roughly 3 hours of direct sunlight. I know when I can take my 15 minute break as the sun goes behind a telephone pole, where to set the still lifes up knowing the path of shadows from the window molding. All of this foreknowledge is important so I can set up early in order to maximize my painting time.


#2: Are you able to control the light?

About the only thing I can do to block out the sun is create some interesting contraptions with boxes, cardboard, and fabric. I've been known to kidnap our dining room table covers. They make great sun blockers and stand on their own with the three panels.

Again, it's not the best solution given that when people visit, which is often, they are greeted by my creative clutter.

To get around the need for controlled lighting, I have learned to have several still lifes set up for each lighting situation. One for night time painting (which I rarely get to, anymore), one for direct sun, and one for overcast days (this also works for morning painting as the sun is on the opposite side of the house).


#3 Do you have special lighting(bulbs) for cloudy days and nighttime painting?

I used to, but the ones that came with my nice lamp burnt out and I don't think I had a spare at the time, so I put in a regular bulb and have not seen a need to do otherwise. This is my currently neglected night-time setup. All of my friends know it well, I'm sure. As you see, here, I have a simple clamp lamp that has a fluorescent ring ( giving a blue/white light) and then a regular bulb (giving a warm light). For me that's all I need. I like to keep it simple, and it doesn't seem to be distorting my paintings.

For cloudy days, I use a simple night stand lamp, like something you'd find in Target or Walmart. I tip the shade, and it's just what I need.

Don't get me wrong, I love looking at art supply catalogs and dreaming, but right now window shopping will do just fine.


This information on my studio lighting practices and hopefully more than I've shared here, as well as other artist's methods, will be coming out in the October 2007 issue of The Artist's Magazine.

Thank you Lauren for your questions.

Friday, March 02, 2007

Letters of Art

Hand lettered envelopes and invitations bring a sense of time, age, and formality like no other craft that I know of.


This week, I began hand lettering addresses for a harp dealer who is announcing the grand opening of a new showroom. Those invited are prominent harp makers from around the world. I addressed the letters bound for Europe, today.


M
y pen nib is made of a very thin metal. It has a split running from the tip to the middle of the nip where there is a hole cut out that holds the ink allowing for multiple words to be written before another dip into the ink is needed. The split allows the ink to run down to the tip and onto the paper. The split also creates the opportunity for thick and thin lines. If I press just slightly, the tips spread and the ink spreads with it creating a thick line of ink. If I ease up on the pressure, the tips come back together giving me a hairline of ink.


Sometimes the needle-like tip catches on the texture of the paper and flecks of ink are splattered about. This inevitably happens on the last word of the address. Often tiny fragments of paper get trapped in the tip and eventually drag and spread the tip - making it impossible to get a fine line. The nib must be cleaned often.


Using a mixture of Copperplate script and Spencerian Script for my lettering, I pick and choose from each alphabet which letter versions I will use.


I am by no means a professional calligrapher, however I find great enjoyment and a calming effect as the slow graceful lines are drawn. One must not rush, one must not fret - even though this may be the last envelope in possession, and everything rests on getting this word right.


I fight the shaky hands and pounding heart as I hold my breath to begin the name. My pen nib is dipped into the ink, and I begin. No loud sounds, please. Oh, let the phone not ring in the middle of this curve. No stray thoughts, only thick and thin lines, subtle and strong curves.

Thursday, February 22, 2007

The Perks

Because of art, I have been blessed to meet so many new people. At times, I have been taken back by their enthusiasm for my work. Elisa Miller has become one of those wonderful people with whom I have gotten to know on a personal level.


I first heard her name when my framer called to tell me that someone had purchased one of my paintings as it was being framed for an upcoming show. Elisa had seen the paintings lined up ready to go, and when it was all said and done, purchased two paintings before my show ever hung in the gallery. I can't express what an encouragement it has been to have her affirmation as a "fan", but much more to have her interested and caring as a friend.

A few weeks ago, when I was feeling particularly frustrated with my art career, she sent an email with a cherry message inviting me to have lunch with her. I got a real treat as I stayed with her until late afternoon. I was able to meet and get to know her beautiful children, prove how terrible I was at Dance, Dance, Revolution with Sydney, and listen to Elisa as she shared what was going on in her life.

We are excitedly collaborating on a commissioned painting inspired by Mom's Home Cooking that will showcase some of her lovely Yellowware.

Thank you for your friendship and encouragement, Elisa!!

Saturday, February 17, 2007

The Key to My Heart


One Valentine's day while my husband and I were dating, I gave him this old tin with the skeleton key inside and a little note pledging that he held the key to my heart. With it, no part of me would be kept from him. No other key would ever be made or given and he will forever be the sole owner of it.


This Valentine's day as a gift to my husband I painted the same objects to keep that closeness of our relationship ever before us in a tangible way.


Here is the unusual set up that was necessary to get the perspective I wanted on the pieces. I don't think I've ever painted on the ground, before, but it was pretty comfortable. At the time this photo was taken I was waiting to begin as a shadow slowly moved across the still life.

Tuesday, February 13, 2007

Retreat Update

On Friday morning the painting began, and three separate canvases were worked on. However on Saturday, I was forced to give in to the sickness that had been oncoming for the last two days. I regrettably had to leave the studio Saturday morning as I was ruining my current painting due to my departing energy.


I can show you the start of one of the paintings from Friday evening. This painting had been in the plan ever since it looked like I'd have the weekend alone. It was a painting that I'd promised my husband for our anniversary, but never got around to starting. It is a 16x20 oil wash on linen - unfinished as you will see. And, of course, there is a story behind the painting.


While I was in grad school, I pulled an all-nighter with my roommates during finals. Two of us were art students and the other was music. We spent all night painting and writing papers. I had 3 paintings to complete in one evening - my own fault, I'm sure.


Well, I did it, and to my surprise they ended up being 3 of my best and strongest paintings. One of them was purchased by the college. And my husband has commented since then that it was one of his favorites and how he wish I hadn't sold it. So I am attempting to recreate this painting in style and subject matter. The style is a sienna wash of a subject matter that is lit only by a candle. I thought that I would have to add at least a little artificial lighting, but I can see it very well. Here is the setup.


Any light you see that is not coming from the candle is only from one small lamp set up so that I can see my canvas.

I am still on the mend and hope to be painting again on Friday. Thank you for your patience, and I apologize for the wait.

Wednesday, February 07, 2007

Weekend Retreat

I'm going on a weekend retreat . . .


. . .with my brushes


. . . in my studio.

It's okay, my husband knows I'll be spending quality time with my brushes while he's away for the weekend. I have four projects lined up which I will present consecutively after the painting weekend is over.

During this weekend I will paint in the morning, afternoon, and evening; socialize little; miss my husband terribly; cook only if I want to; and say "no" to housework. By the end I expect to see improvement, be tired yet refreshed mentally, be energized and excited about painting.

Onward!

By the way, the apples are coming soon, I promise!

Friday, February 02, 2007

Inspiration

It’s been on my mind lately. What is it about painting and art that is so fulfilling? Why do I and countless others find such enjoyment in recording and interpreting what we see? What is our inspiration?

For many artists the answers to those questions vary and can be quite complex. Some are motivated by special memories that an object or a place holds. Some have a journalistic thread running throughout them compelling the artist to paint scenes that promote awareness about current issues, or important stories to be told.

Or it could be as it was for me last night simply seeing something that catches the eye. The way light may fall on a subject and how that object is shown and reacts to the light.

We were cleaning up after having some guests in our home, and as I put a bowlful of uneaten apples into a smaller bowl, it hit me. The only light in the room was coming from our stove hood. When it hit those deep red apples that I had just placed into a bright yellow bowl, my first thought was, “now there’s a painting”. A feeling of excitement came over me, as many times before, I envisioned this beautiful still life already painted on my canvas.


When this happens, it’s almost like a food craving. I’ve got to paint this, now. Unfortunately life doesn’t always allow one to satisfy such cravings. There’s the lineup of already in progress still lifes that should be completed before I start anything else. Plus there are the promises to others of paintings yet to come. Or any one of the many important and necessary duties a wife has that will take priority over such desires. Then there is the dreaded day job that most artists must endure.

But sometimes I think to myself. “Surely I can paint this in just a few hours. I’ll let the laundry wait one more day. I’ll find a tiny spot in the studio to set up this one quick painting. If I don’t paint it now before the apples are eaten (I noticed this morning that my dear husband took a few for his lunch), or before my excitement runs down, it will not get painted.”

So with that, I close my blog.
Excuse me, I have some apples to paint.

Monday, January 29, 2007

The Arrangement I ~ a work in progress

Saturday afternoon, I began this still life, and immediately found it to be challenging in many ways.

These photographs were taken this morning, and as you can see, the background has changed somewhat from my original block in by a light dusting of snow. Not to worry, I will paint the background after the snow melts away (and it is sure to melt considering the sort of mild winter we have had.) And, do not fret for I will not be painting my neighbor's trash into the painting, either. Ah, artistic license.


I'm not sure how effective the red vase will be with the rest of the painting having a light and muted feel. I am intrigued by the intense shades of oranges and reds I see as the afternoon sun sifts through the vase. So I will press on, and perhaps a striking yet pleasing painting will result.

Here are photographs after the first painting session.


With some selective measurements down, and the background loosely and thinly blocked in, I focus on the most structural (and I thought the easiest) object in the painting, the vase. If I can get this part of the painting correct, everything else will fall into place.


As you can see, there are some drawing corrections to be made, however the feel, color, and temperature are correct and soon when those corrections are completed, I will have a solid foundation from which to base the rest of the painting.

I look forward to putting in those buttery white daisy petals that are caught in the sun light. That will be a fun session. More to come on this 16x20 painting in the near future.

Tuesday, January 23, 2007

Red Chili Peppers

Another still life completed under the ever changing light.


It was a very dark and stormy sky, today so I discarded a still life that needed to be painted in direct sun and set up another one with a lamp. As I finally sat down to begin painting, the sun came out brightly from behind the clouds. So I put my lamp away and began to block in the painting in the sun. About a half hour into my block in, the sky darkened and seemed as if it would remain that way for the rest of the day. Out my lamp came. I painted over some areas as the lighting changed just about everything that I had already laid down.

Wouldn't you know it, about two hours later, the sun came out and beamed until it set late afternoon. At that point too much was completed, so I came inside the house and started cooking dinner - planning to paint after the sun went down.

Here is the completed piece, painted in all variations of light from glaring sun to nightfall. In the end, the subject was so pleasing to me that I was determined to see it through.

Wednesday, January 17, 2007

My Palette

Inspired by a question from another artist on the WetCanvas! Forum, I decided to share with you the paints that you will find on my palette.


From left to right:
* denotes paints used on occasion

Titanium White
Cadmium Yellow Light

Yellow Ochre
Cadmium Yellow Meduim*
- I'm really starting to fall in love with this color.
Cadmium Red Light
Cadmium Red Medium*

Permanent Alizarin Crimson*
Burnt Sienna - I think I'm addicted to this pigment. I'm not sure how I could paint without it on my palette.
Viridian - after reading some reports on non-lasting qualities of sap green, I have been using Viridian instead and have been mixing my own sap green.
Ultramarine Blue
Phthalo Blue - I love this blue and use it sometimes to give a little punch to my shadows.

There you have it. I don't use the fancy colors, not yet, anyway. Mostly because either I haven't tried them, yet, or they're too expensive for me to get hooked on. I find that a more limited palette is better for me. I try to keep things simple.

Tuesday, January 09, 2007

Study of White

Fighting with the Sun

The weatherman said that it would be cloudy out today, but as I set up to paint, the studio was in full sunlight. It was clear that I would not be completing the painting I had started on my last overcast day. After changing gears and a simple setup, I was ready to do a quick study for the day.


Wouldn't you know it, the sun decided to play peek-a-boo with me. It went behind clouds for several minutes, and then shone bright for a few more minutes. Back and forth it went until finally the day ended in a dark overcast - completely changing the light and shadows that I had started with.

Thankfully, most of the painting had been established at that point, so I pulled out my trusty lamp and completed the study. Granted, it's not as strong or as detailed as it could have been, but I must say that the blame cannot fully rest on the shifting light. Any painting that is not my best shows a need for more concentration and, if I allow it to, it will teach me through my mistakes.

More painting on Friday.

Monday, January 08, 2007

Temperature

Temperature is another facet of color that adds to the complexity of mixing paint. All colors can be referred to in terms of either cool or warm. The warm shades being yellow, orange, red. . etc. Cool colors are white, blue, green. Yellow is known as the warmest color on ones palette while white is the coolest.

Here's where it gets a little complex. Aside from those two, the temperature of a color is relative - meaning, how you categorize a color depends on the colors around it. For instance, green can be considered a cool color because it has blue in it; however, it also has yellow in it. So if green is next to blue, we would call that green warm because it is warmer in comparison to blue. Compared to red, green is a cool color.

Here's another little twist. Let's take the color red, for instance. If we add yellow to red, making it lean slightly to the orange side, that is a "warm red". But if we add blue to the red, bringing it toward lavender, then we can say that it is a "cool red". There are many subtle shades to any one color, and they all can be categorized as warm or cool.

In the teacup painting above, look at the cool white color in the lower left hand side of the painting. Then compare that to the yellowy color right before you get to the shadow underneath the saucer. It moves from a cool white to a warm white.

In the background, upper right. You will see some yellow mixed in with the blue. The areas where you see more yellow in the blue, that is considered warm blue. Even though blue is just about as cool of a color as you can get, it is described as a warm blue to explain the shade.

What other observations about color temperature do you see?

Thursday, January 04, 2007

Values

If you remember in an earlier post "In the Kitchen III", I began explaining a few artist terms. The reason for the explanations was this possibly confusing sentence: "It's amazing what a few hours of concentration and about 50-70 correctly placed shapes of accurate value and temperature will do." The first half of the sentence was explained in that post, but here I must continue our little art lesson.


Value: Value is simply how light or dark a color is. I could say, "That shadow is darker in value", or "the snow is a light value." You may refer to the values in a painting as being correct - meaning that the artist has properly painted the lights, darks, and mid tones. You can never get a color right, unless it is correct in value. The red can never be the exact red you are going for unless it is the same value (lightness or darkness) as the red in your subject.

In the above rose painting, we can say that the leaves for the most part are lighter in value than the darkest background values. You may be able to see this clearer by squinting at the painting. The magic squint as Richard Schmid calls it simplifies the values for us so we aren't overwhelmed with all the value changes that are really there.

The lower part of the stem (lower right) is a darker value than the surrounding background.

What other observations can you make on this painting regarding value?